Developer Tools
The Developer Tools power-up offers a wide range of board customization using own scripts and stylesheets. All you need are great ideas and basic knowledge of Javascript and CSS. All of the currently available Developer Tools can be enabled from board Settings → Power-Ups → Developer Tools.
Note, that Developer Tools are available to users of account owner or admin privilege.
With the Developer Tools power-up, you can enhance your board with custom scripts and stylesheets—bringing your ideas to life with just a bit of JavaScript or CSS!
Explore a growing collection of free scripts in our GitHub repository, or create your own to tailor Kanban Tool to your needs. Unleash the full potential of customization, making the workflow truly your own!
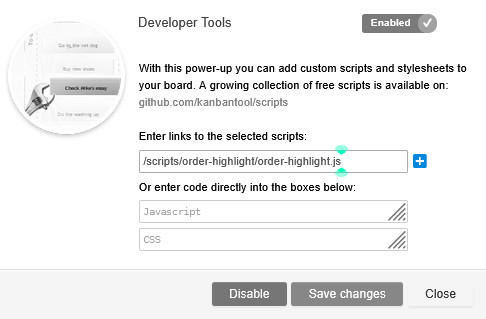
Developer Tools can be added directly from your board’s Settings → Power-Ups → Developer Tools page, in one of the following ways:
- Link to a script from Kanban Tool’s GitHub repository – select “Enter links to the selected scripts”.
- Custom JavaScript – paste your own code under “Javascript”.
- Custom CSS – apply your own styles under “CSS”.
Want to make your cards titles larger?
Try this simple script to increase the default font size on closed tasks:
- medium-font.css gives your text a subtle size boost.
- large-font.css makes it extra easy to read at a glance.
How to apply it?
To use the Large Font script, go to board Settings → Power-Ups → Developer Tools and paste either of the following links to the Enter links to the selected scripts area, and confirm by clicking the Save changes button.
/scripts/large-font/medium-font.css
/scripts/large-font/large-font.css
Prefer specifying the font size and type yourself?
You can! Instead of using Large Font, simply customize the below CSS to your preferred font family and size (use em or px values), then paste it to the CSS slot in Developer Tools.
.kt-task-body {font-family:"PT Serif" !important; font-size:2em !important;}
Rather increase all board elements?
You’re welcome to also adjust the board zoom in the Board Background settings to scale up the entire board view. No script links or CSS pasting required!
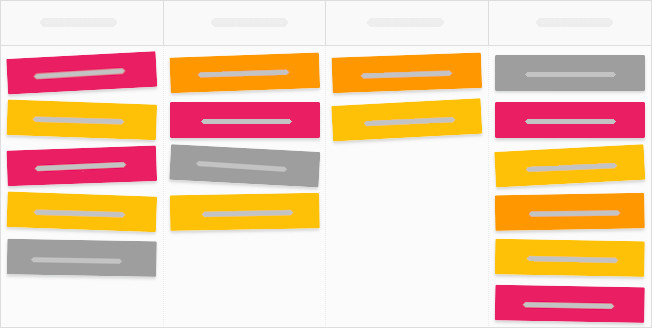
Want to add flair to your boards? The Card Tilt script gives your cards a playful, sticky-note look—breaking away from rigid alignment for a more creative feel.
How to apply it?
To use Card Tilt, go to board Settings → Power-Ups → Developer Tools and paste the below link to the Enter links to the selected scripts area, then confirm by clicking the Save changes button.
/scripts/card-tilt/card-tilt.js
Want to further adjust the board design?
Try the following features to make the board more fun-looking and engaging for your team:
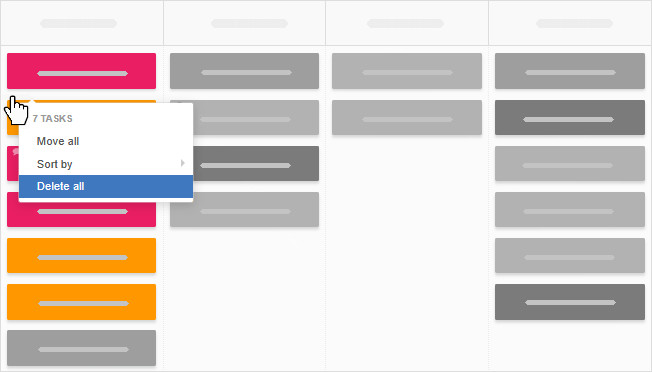
Tired of deleting tasks one by one? The Delete All script makes it easy!
It adds a Delete all option to your column’s context menu—just right-click an empty space within a column to access it.
How to apply it?
To use the Delete All script, go to board Settings → Power-Ups → Developer Tools and paste the following link to the Enter links to the selected scripts area, then confirm by clicking the Save changes button.
/scripts/delete-all/delete-all.js
Be sure to use this functionality with care—while removed tasks can be recovered for a limited time, only account admins and owners have access to this action.
For best results, we recommend archiving completed tasks instead of deleting them.
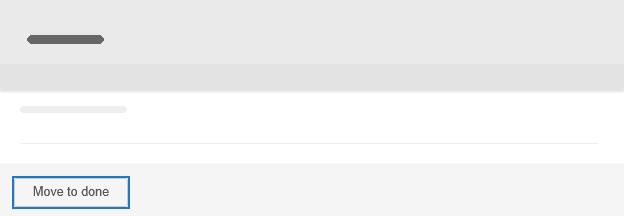
The Save and Done script adds an extra option to your open task view, giving you the power to send a card to the end of the process with a single click.
When you click the new Move to done button, the card will be saved and moved to the last (rightmost) column of your board. No more tedious manual moves of those tasks that don’t need to go through the entire board of process columns!
How to apply it?
To use the Save and Done script, go to board Settings → Power-Ups → Developer Tools and paste the following link to the Enter links to the selected scripts area, then confirm by clicking the Save changes button.
/scripts/save-done/save-done.js
Want a quicker way to wrap up tasks? The Task Done script adds a new option to your task’s context menu, letting you instantly move it to the last column—no matter where it is on your board.
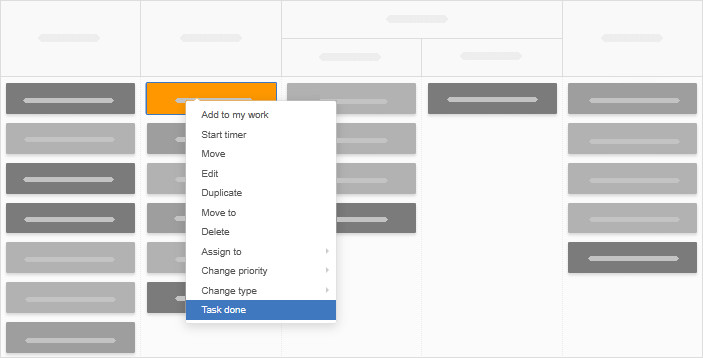
Perfect for tasks that don’t need to go through the full workflow, this simple shortcut helps you stay organized and work more efficiently.
How to apply it?
To use the Task Done script, go to board Settings → Power-Ups → Developer Tools and paste the following link to the Enter links to the selected scripts area, then confirm by clicking the Save changes button.
/scripts/task-done/task-done.js
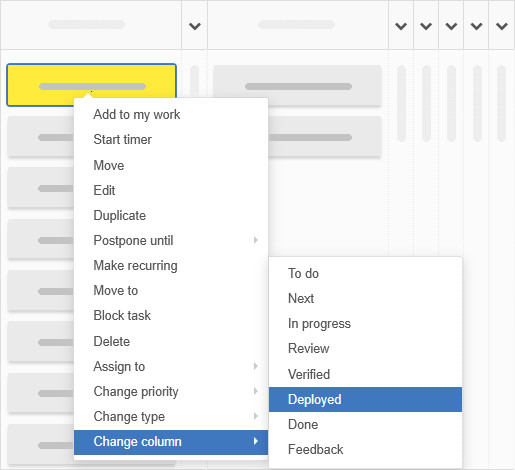
Supercharge your productivity by enabling an additional card menu option for quick transfer of tasks between any board columns!
How to apply it?
To use the Change Column script, go to board Settings → Power-Ups → Developer Tools and paste the following link to the Enter links to the selected scripts area, then confirm by clicking the Save changes button.
/scripts/change-column/change-column.js
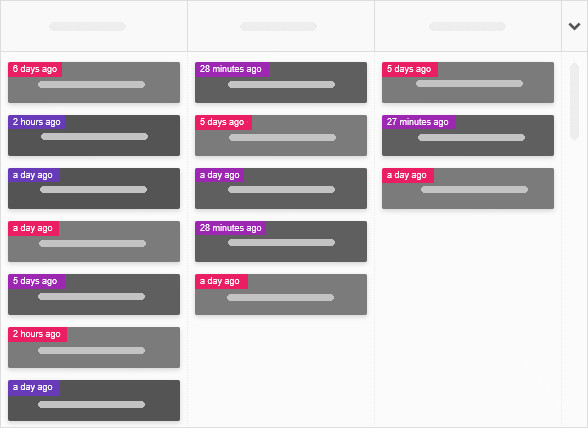
Keep track of your workflow with ease! The Cycle Time script adds a time elapsed value to each card, showing you exactly how long it’s been since it was created.
With this real-time insight, you can quickly gauge process efficiency and stay on top of your progress.
How to apply it?
To use the Cycle Time script, go to board Settings → Power-Ups → Developer Tools and paste the following link to the Enter links to the selected scripts area, then confirm by clicking the Save changes button.
/scripts/cycle-time/cycle-time.js
Want a cleaner, more organized board? The Fixed Cards Height script ensures your tasks align perfectly, eliminating extra spacing between cards in wider columns.
Choose from four final card heights—small, medium, large, or extra large—to customize your board’s look and keep everything neatly arranged. Give it a try and enjoy a tidier workflow!
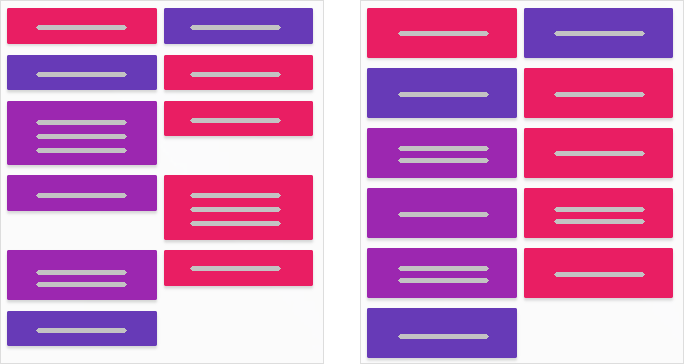
Note: This script isn’t compatible with some of the task-design-altering power-ups: Interactive Checklists, Card Covers, and Task Summary.
How to apply it?
To use the Cycle Time script, go to board Settings → Power-Ups → Developer Tools and paste one of the following links to the Enter links to the selected scripts area, then confirm by clicking the Save changes button.
/scripts/fixed-cards-height/small-cards.css
/scripts/fixed-cards-height/medium-cards.css
/scripts/fixed-cards-height/large-cards.css
/scripts/fixed-cards-height/xlarge-cards.css
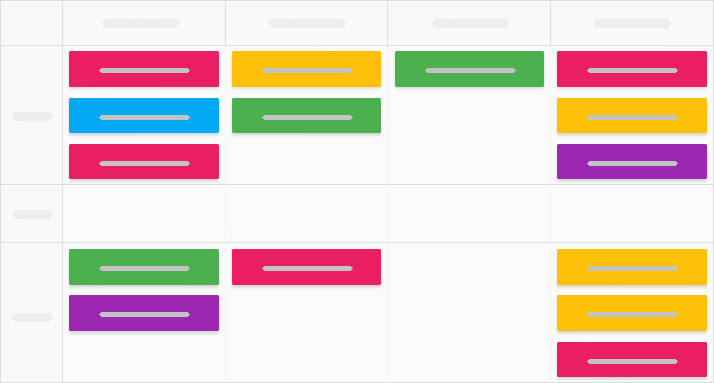
Want to make sure tasks are tackled in the right order? The Order Highlight script has you covered!
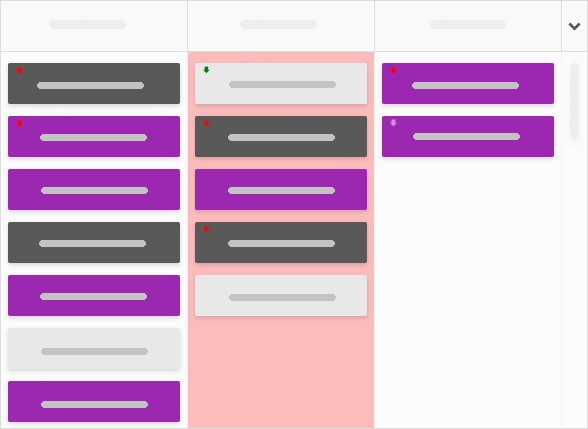
The add-on highlights columns in red whenever tasks are out of priority-based order, giving you a clear visual cue when priorities are being overlooked.
The script follows this hierarchy:
- High Priority → Normal Priority (or no priority set) → Low Priority
How to apply it?
To use the Order Highlight script, go to board Settings → Power-Ups → Developer Tools and paste the following link to the Enter links to the selected scripts area, then confirm by clicking the Save changes button.
/scripts/order-highlight/order-highlight.js
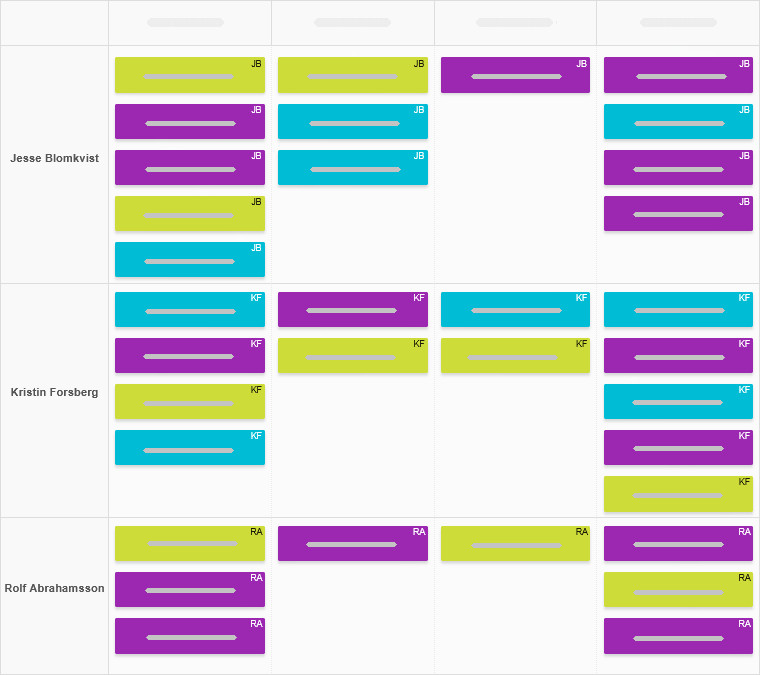
If you want each swimlane on your board to hold tasks for a specific team member, you can set it up so that moving a card into a given swimlane automatically assigns it to the right person.
Since every assignment triggers an email notification, everyone will stay in the loop and nothing will slip through the cracks.
How to apply it?
Need help tweaking your board and swimlane names? Visit this page.
Want a quick way to personalize your team’s board? The User Avatars script adds team members’ pictures to card fronts, making it easy to see who’s working on what at a glance.
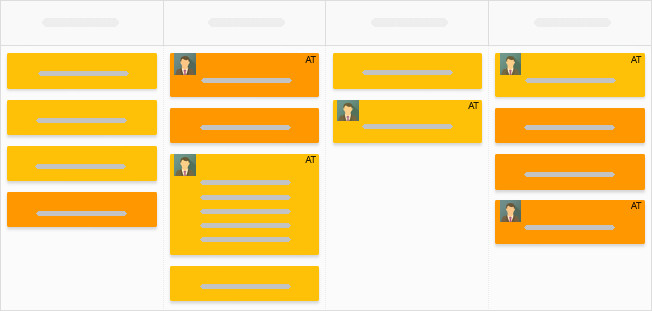
How to apply it?
- Note, that the script requires customization.
- Upload your team’s photos online and add their image URLs to the script template available here. Include images for all team members working on the board, to avoid broken previews.
- Go to board Settings → Power-Ups → Developer Tools and paste your modified code to the designated Javascript area, then confirm by clicking the Save changes button.
If you frequently update your board—tweaking card types, template, background, workflow layout, power-ups, or process automation—you can get to the specific settings pages faster!
The Show All Settings script adds direct links to these options right next to the Tools menu, so you can jump straight to what you need:
- T – Card Type
- C – Card Template
- B – Board Background
- W – Workflow Editor
- P – Power-Ups
- A – Process Automation
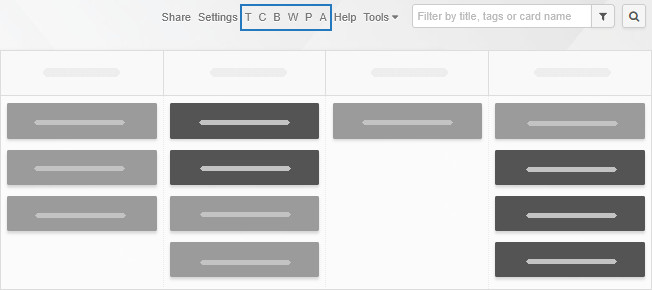
How to apply it?
To use the Show All Settings script, go to board Settings → Power-Ups → Developer Tools and paste the following link to the Enter links to the selected scripts area, then confirm by clicking the Save changes button.
/scripts/show-all-settings/show-all-settings.js
Feeling like your board looks could use a refresh? The Card Opacity script adds a sleek touch by making closed cards semi-transparent, giving your board a lighter, more modern look.
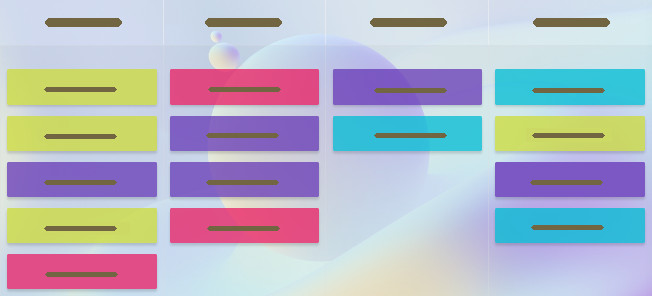
How to apply it?
To use the Delete All script, go to board Settings → Power-Ups → Developer Tools and paste the following link to the Enter links to the selected scripts area, then confirm by clicking the Save changes button.
/scripts/card-opacity/card-opacity.js
For the best effect, combine it with the Lite Theme—it’s a perfect match!
By default, task cards display a numerical checklist progress — e.g., 3/5 — or a ✔ when everything is checked off.
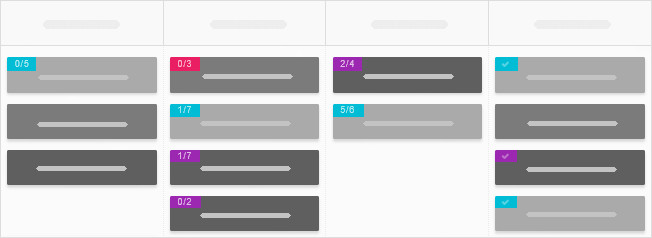
The Checklist Progress Bar script takes it up a notch by adding a sleek white progress bar to closed cards—giving you an instant visual of how far along you are.
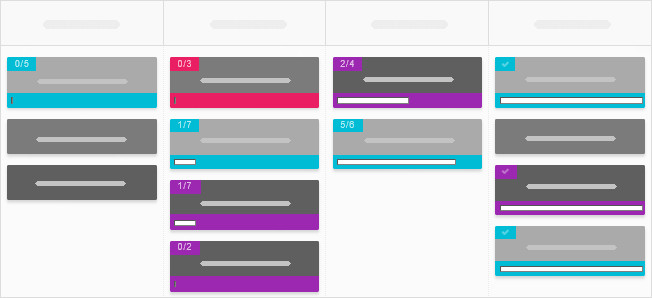
The bar’s length adjusts dynamically based on completed checklist items, making it easy to track progress at a glance and giving you that extra boost of motivation as you get closer to your goals!
How to apply it?
To use the Checklist Progress Bar script, go to board Settings → Power-Ups → Developer Tools and paste the following link to the Enter links to the selected scripts area, then confirm by clicking the Save changes button.
/scripts/checklist-progressbar/checklist-progressbar.js
Feeling like making your workflow more visually intuitive? You can add images to each column header for quick recognition of different stages.
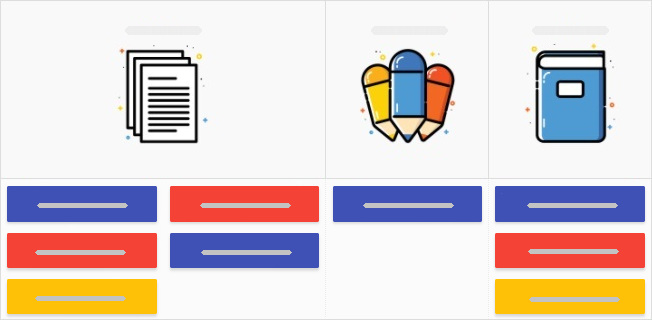
How to apply it?
- Note, that the script requires customization.
- Attach the column image files to any card on the board.
- Copy the script template from here to a notepad.
- Customize the script to include:
—The URLs of your uploaded images
—The exact column names where each image should appear
—If your board has more than three columns, simply add extra lines in the script to include them all.
- Go to board Settings → Power-Ups → Developer Tools and paste the modified script to the Javascript area, then confirm by clicking the Save changes button.
Note: When using images for sub-columns as well, to collapse them correctly, collapse the sub-column first, and then the main column.
Want images on card fronts too? Check out the Card Covers power-up!
Need a clearer view of your to-do items? The Large Interactive Checklist script boosts the font size of checklist items on closed cards, making them easier to read at a glance.
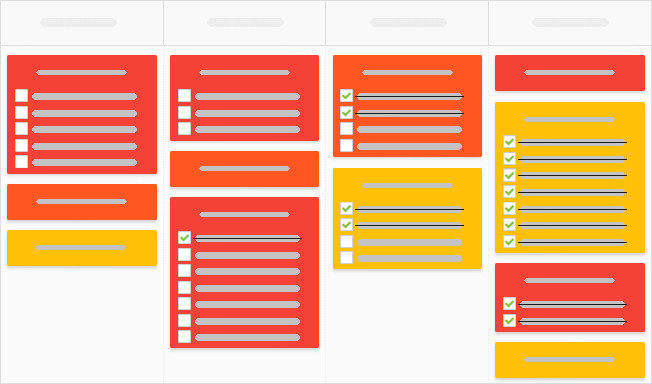
How to apply it?
To use Large Interactive Checklist, go to board Settings → Power-Ups → Developer Tools and paste the following link to the Enter links to the selected scripts area, then confirm by clicking the Save changes button.
/scripts/large-interactive-checklist/large-interactive-checklist.css
How to customize it?
Want a different font size? No problem! Access the script in our GitHub repository, adjust the px value for font size, and paste the updated lines into the CSS slot in your board’s Developer Tools.
Looking to enlarge everything on your board?
Try the board zoom feature for a full-size boost!
Finding the standard card colors too bright? The Card Saturation script lets you tone them down for a softer, more muted look.
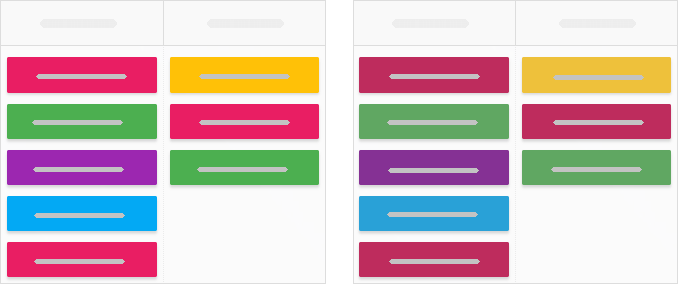
How to apply it?
To use Card Saturation, go to board Settings → Power-Ups → Developer Tools and paste the following link to the Enter links to the selected scripts area, then confirm by clicking the Save changes button.
/scripts/card-saturation/card-saturation.css
How to customize it?
Want to further adjust the saturation level? Simply access the script, modify the shown 0.8 saturate value to your preference, and paste the updated line into the CSS area in your board’s Developer Tools window.
Enjoy a more visually balanced board that suits your style!
Want to make sure only high-access-level team members can decide when tasks are archived? The No Archive script has you covered!
It removes the “Archive” option from task context menus for everyone—except account admins and owners—ensuring only the right people can put tasks away.
How to apply it?
To use No Archive, go to board Settings → Power-Ups → Developer Tools and paste the following link to the Enter links to the selected scripts area, then confirm by clicking the Save changes button.
/scripts/no-archive/no-archive.js
By default, swimlanes have a minimum height of three cards, which can make your board quite tall—especially if you have many swimlanes. Want a more compact view? The Shorter Swimlanes scripts let you shrink them down in one of two ways.
How to apply it?
Task priority is a popular Kanban Tool feature, available both from the open card view and the card’s context menu. But if you’d rather disable priority on your board entirely, here’s how you can do it:
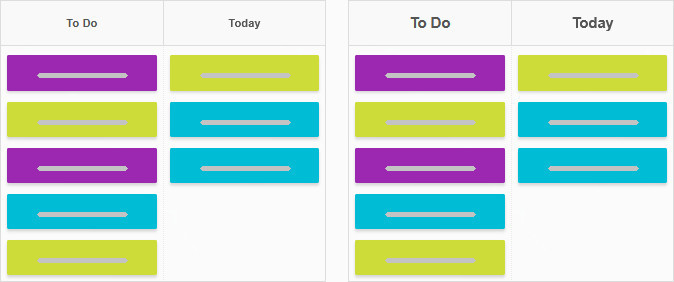
Want your column names to stand out? The Large Column Headers script increases the font size of work stage names, making them more prominent on the board.
Best of all, the font scales proportionally, so even when you apply a board zoom, the headers remain clear and well-sized.
How to apply it?
To use Large Column Headers, go to board Settings → Power-Ups → Developer Tools and paste the following link to the Enter links to the selected scripts area, then confirm by clicking the Save changes button.
/scripts/large-board-headers/large-board-headers.css
Fancy adding a bit of color to your board design?
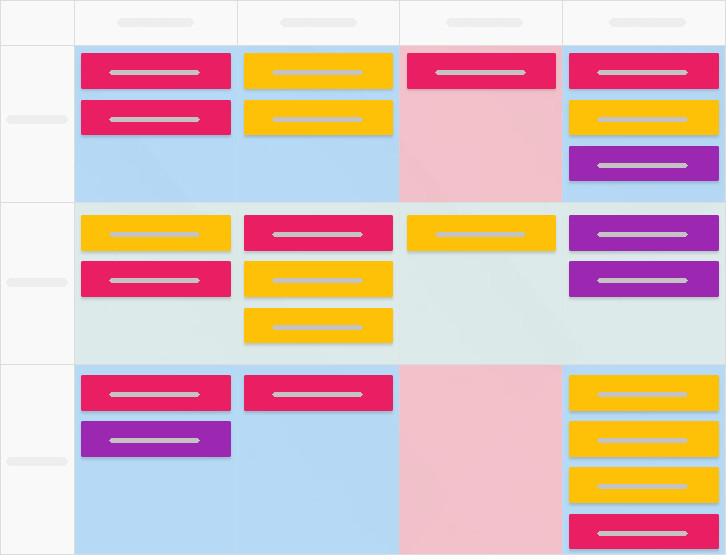
While the Column Highlight power-up lets you underscore specific columns with a color, the Column Background script lets you fill entire columns—or swimlanes—with color, making key areas stand out at a glance.
How to apply it?
- Note, the script requires modification.
- Copy the script template and customize it to match your board’s unique column or swimlane names.
- Go to board Settings → Power-Ups → Developer Tools and paste the modified script to the designated Javascript area, then confirm by clicking the Save changes button.
Want to apply further design changes? Explore Board Background settings for color themes and zoom adjustments, card types for task color modifications, and Card Covers or Task Summary for expanding closed task display with images or extra information.
Kanban Tool’s Time Tracking automatically logs time when a task moves to an In Progress column type and pauses when it moves elsewhere—so you can focus on the work, not on managing the timer.
However, it is also possible to track time only while you have the full task view open.
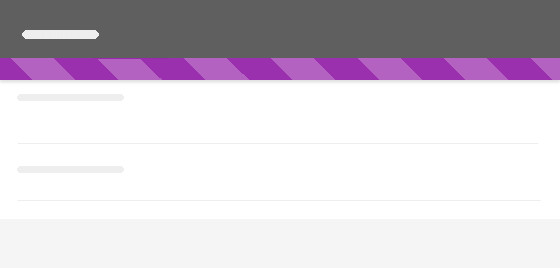
The Task opening/closing starts/stops the timer script will start the timer when you open a task, and stop it when you close it. Regardless of what column type the opened task is in.
How to apply it?
To use Task opening/closing starts/stops the timer, go to board Settings → Power-Ups → Developer Tools and paste the following link to the Enter links to the selected scripts area, then confirm by clicking the Save changes button.
/scripts/task-start-timer/task-start-timer.js
Tasks linked through Task Dependencies appear as a list in the task view. However, if what you want is a quick visual cue right on the board, that too is possible.
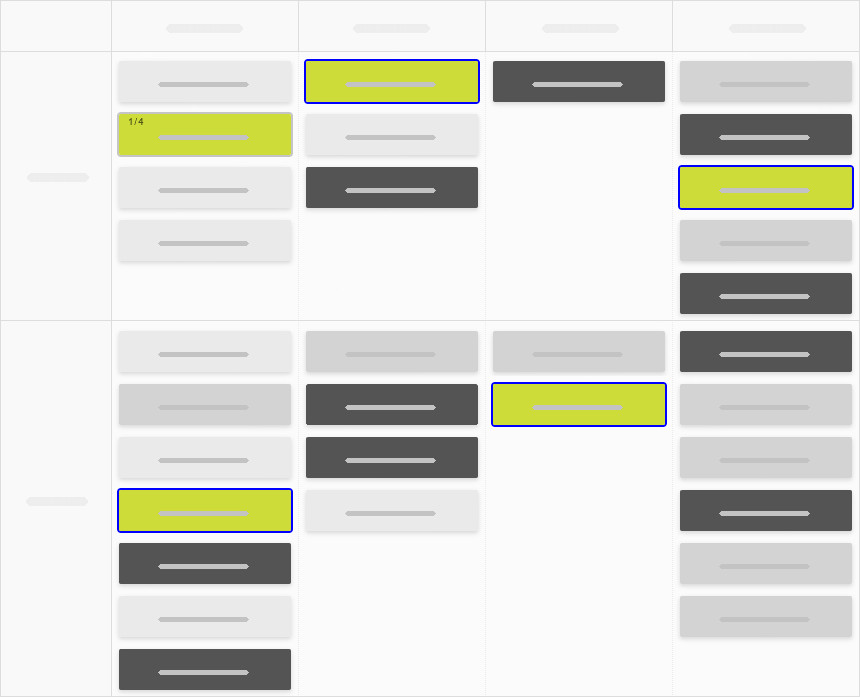
With the Task Dependencies Highlight script, you get a preview of which cards depend on a parent task. The parent task keeps its regular highlight, while dependent cards get an extra pop of color for clarity.
How to apply it?
To use Task Dependencies Highlight, go to board Settings → Power-Ups → Developer Tools and paste the following link to the Enter links to the selected scripts area, then confirm by clicking the Save changes button.
/scripts/task-dependencies-highlight/task-dependencies-highlight.js


