Account management
A step-by-step guide on how to open, manage or close your Kanban Tool account. Signing up to the service and setting up users. Learn the difference between the account owner, administrator and who can do what with the account.
How do I set up a new user?
Use the share option on the dashboard, or from any board
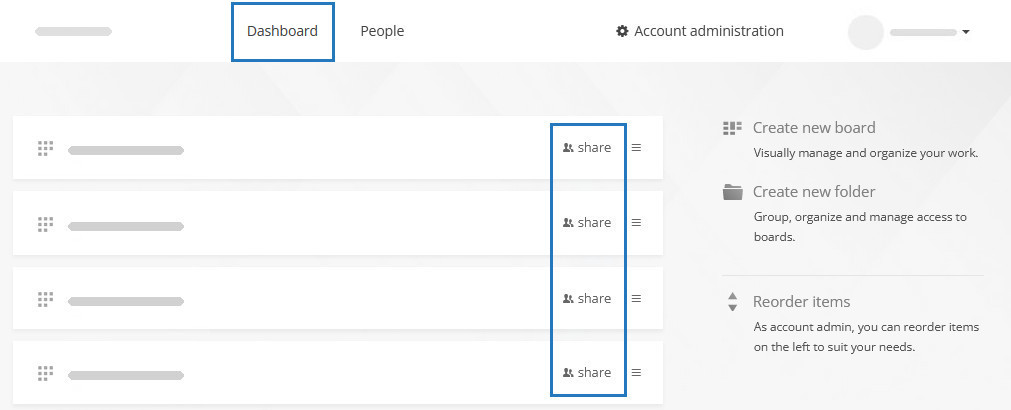
A share link is available on the dashboard - next to each board and folder. For quicker access, it is also listed on each board, next to Tools and Settings, in the top-right corner.
The share option is only visible to account owners, admins and project managers. To add a new person to your account:
- Click share to open the item’s access settings.
- Click on Add new person, and fill the form.
- Choose full access to allow the invited person to create, modify, move and delete tasks. After that, this user will have access to this board or folder only. To give the team member access to more boards, share each of them individually, in the same manner.
You can also add users through the People tab, just click Add new person, and fill in the form
If you want for the new user to automatically get access to a specific set of boards, include them in a user group - from the “groups” setting.
To allow a user to view all boards and folders, give them the account administrator privilege.
You can also import team member details with a .csv file
If you have a .csv file with people you would like to add to the account, you can import their details at once.
Can’t see the share options?
If you do not see the share option, it means one of two things:
-
you are not an account owner/admin,
in which case please contact an admin so that they either invite new team members on your behalf, or increase your access rights. -
you are inside a folder view, and not in the dashboard,
in which case, exit the folder - go back to the dashboard (youraccount.kanbantool.com) and share the entire folder with someone. When boards are placed in a folder, they lose their individual sharing options, which are transferred up to the entire folder.
How to sign in to Kanban Tool?
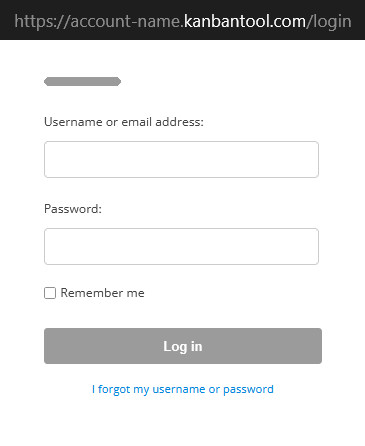
Kanban Tool creates accounts for each team (or a solo user), that can be accessed directly under a custom website address. Each account gets an individual subdomain, e.g. mycompany.kanbantool.com. So, rather than logging in at our homepage, users log in at their own subdomain address.
To create a new account, please go to signup page. If you’d first like to learn more about starting an account, please view this short guide.
To log in to your account, enter your domain name in the browser’s address bar - mycompany.kanbantool.com - and enter your unique username and password. If there are more users on your account, although you’ll be all logging in at the same mycompany.kanbantool.com, the login, and password will be different for each team member.
If you don’t remember your domain name in Kanban Tool, please check your email or browser history. When registering we have sent you an email titled: Welcome to Kanban Tool, or you might have been invited to join Kanban Tool by an account owner - either way try to find the first email you got from Kanban Tool.
If you can’t recall your password, use the password reset link I forgot my username or password, available on your login page. A password reset link will be sent to your email. If you haven’t received the email, check the Spam folder. If you encounter any further problems, please contact us.
How can I delete my account in Kanban Tool and all related data?
Only proceed with this action if you are absolutely certain you want to delete your account and all associated data.
Login to your Kanban Tool account through a web browser, next navigate to Account administration - Account details page and use the “Please cancel my account” link. You need to have an account owner privilege, to cancel the account.
Alternatively, you can contact us at support@kanbantool.com, and we can cancel the account for you.
Your account and related data will be removed according to the scope and schedule outlined in our Privacy Policy.
We would appreciate it if you could provide feedback on why you want to cancel your account. Your insights are valuable to us as we strive to offer the best Kanban software on the market.
Instead of canceling, consider switching to the Free plan, which is limited to 2 boards and 2 users, with no file attachments. You will need to suspend any excess users and delete additional boards before downgrading through Account Administration - Plan & Billing Details.
If you have an active payment subscription for the account, either of the above methods will result in its cancellation.
Can I share or move boards between accounts?
Unfortunately, you cannot copy, move, or share boards between accounts.
The accounts (domains, as in your-account.kanbantool.com) are isolated from each other in our system architecture. Boards and users are quite deeply interconnected with individual domains.
For that reason, Kanban Tool does not support any board interaction between accounts.
Therefore, we highly encourage that teams test and use the service from a shared account - there are no limits to how many users can access one account at the same time.
Also, thanks to the user privilege settings (account owner, account administrator, project manager), different users can have access to completely different sets of boards within one account, so there is no need to worry that all information will be accessed by an entire group of people.
Previous account owner quit. How to become an account owner?
If you have access to the account owner’s email, please reset his/her password to Kanban Tool. To do it, please go to https://youraccount.kanbantool.com and click I forgot my username or password and then enter the owner’s email address. A link to reset the password will be sent to his/her email.
After logging in to Kanban Tool you will be able to grant yourself access as an account owner. Do this from the People tab - click edit next to your name. Then, simply check all access levels: Project manager, account administrator, and account owner.
Can I evaluate Kanban Tool for free at a full-featured level (I need attachments)?
Of course, you can test the paid plans. Simply sign up for a free trial on the Team or Enterprise plan here, or change your current trial plan.
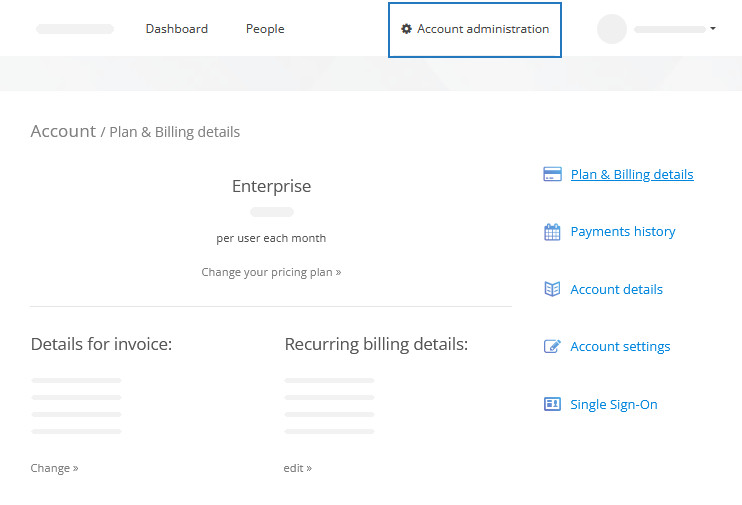
To change plans, go to the dashboard and choose Account administration, then Plan and billing details.
How to disable the daily Work Summary email?
The Work Summary emails let users know how much work they did during a day, offering a list of all tasks that were being edited or created by them on all boards. It also provides information on what other team members were up to - that goes for only those team members, that you have a shared board with.
The time of the email’s arrival can be set in My Profile - Edit my details, under Send me daily work summary at. To disable these emails, just choose never in the Send me daily work summary at option. You may also use the Unsubscribe link below one of these emails to stop receiving them altogether.
Mass user Work Summary email preference management
It is also possible for an account admin to edit other users’ Work Summary email preferences. Just go to the People tab and hit the edit button for a specific team member. In the options available, you’ll find a Send daily work summary at: option.
The team member can still change this for themselves in their Profile settings - the last change made will be kept as active. This is a great way of managing information flow for your team when setting up a new project, while still leaving individual employees a choice in their email updates.
What user privileges are available in Kanban Tool?
The boards in Kanban Tool can be shared and accessed by people in various capacity and the fact, that you’ve shared one board with someone does not mean that they will now have access to all of the boards and data within the account.
So, you can share just some of the boards with a specific user - and keep some boards private, or reserved for other team members. Each board is shared individually - via the share link.
You can also share boards in a limited way with other users, i.e. by giving them a read-only access or a custom access - for instance: letting them create cards, but not delete them.
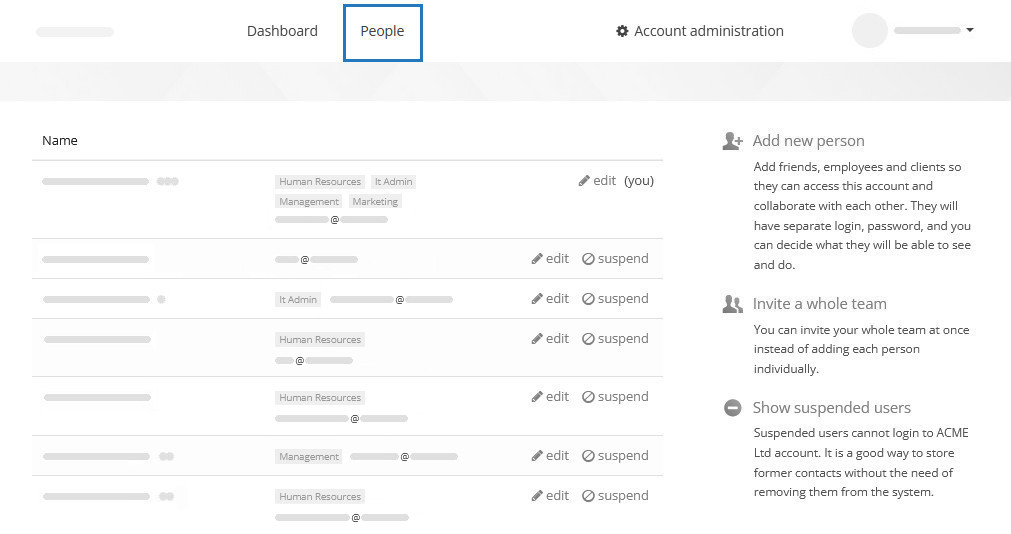
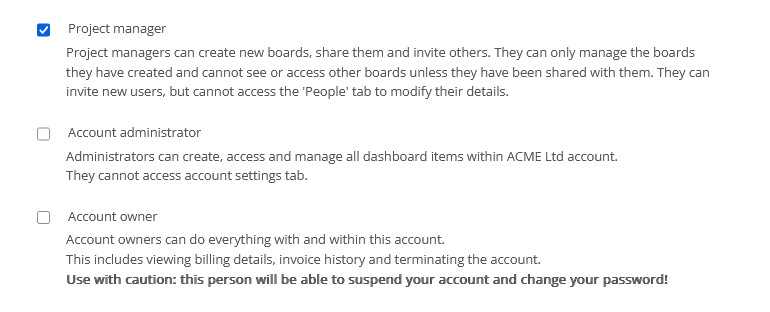
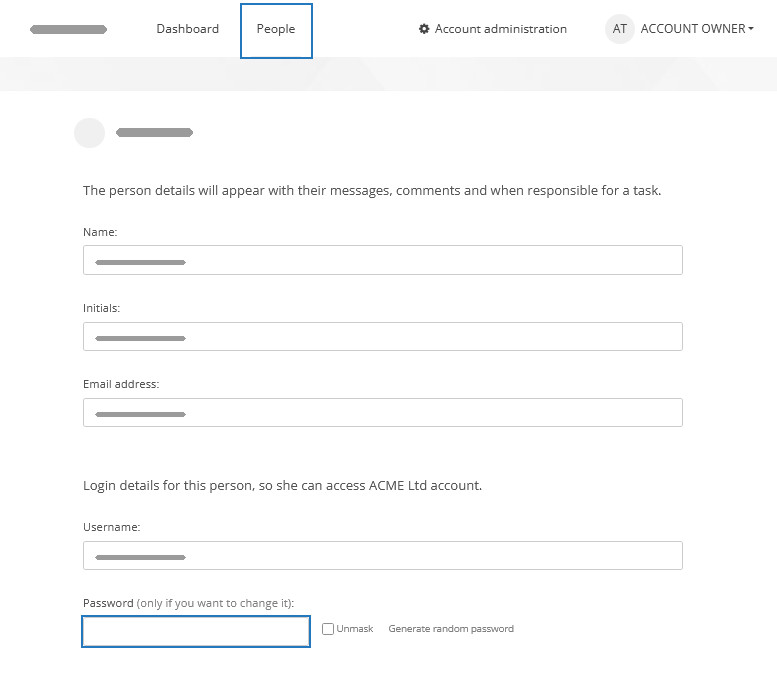
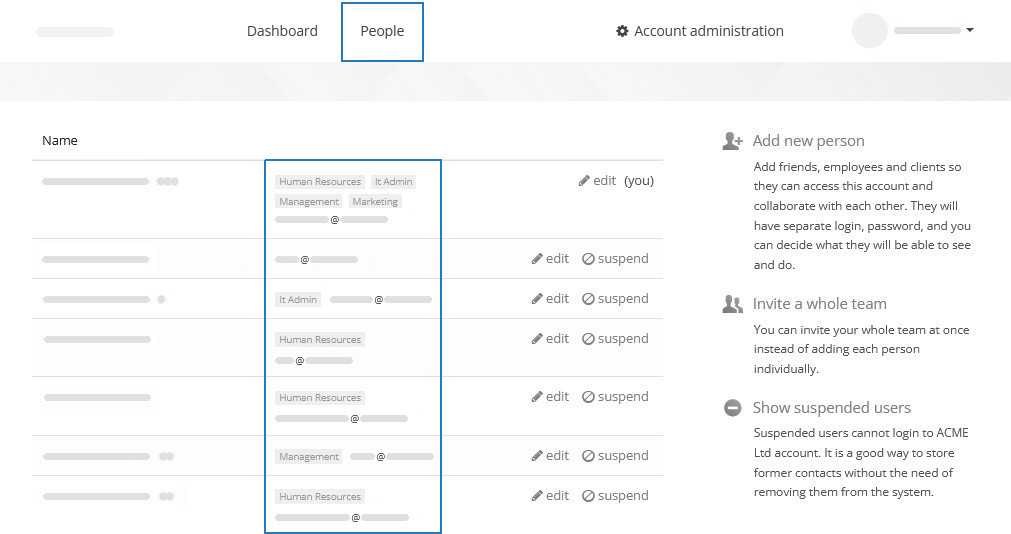
You may also wish to allow some users access everything on the account, or at least create boards for themselves. That’s what special user privileges are there for. You can assign them to the team members from the People section of your account, under the edit link next to a user’s name:
There are three privilege levels:
-
Project Manager
Project managers can create new boards, share them, and invite others to join their boards. They can only manage the boards they have created and cannot see or access other boards unless they have been shared with them. They can invite new users, but cannot access the People tab to modify their details. -
Account Administrator
Administrators can create, access, and manage all of the dashboard items within an account. They cannot access the Account Administration tab. They can access the account’s People tab. -
Account Owner
Account owners can do everything with and within an account. This includes viewing billing details, invoice history, and terminating the account. Please use this privilege with caution: an account owner will be able to suspend the account and change anyone’s password!
Note, that to keep some boards private from any other team members, you’d need to be the account’s sole owner.
How to give someone read-only access rights to my boards?
You’re welcome to share your boards in a limited capacity with some or all users of your account. Access rights can be set for each board separately, leaving you wide flexibility in data sharing options.
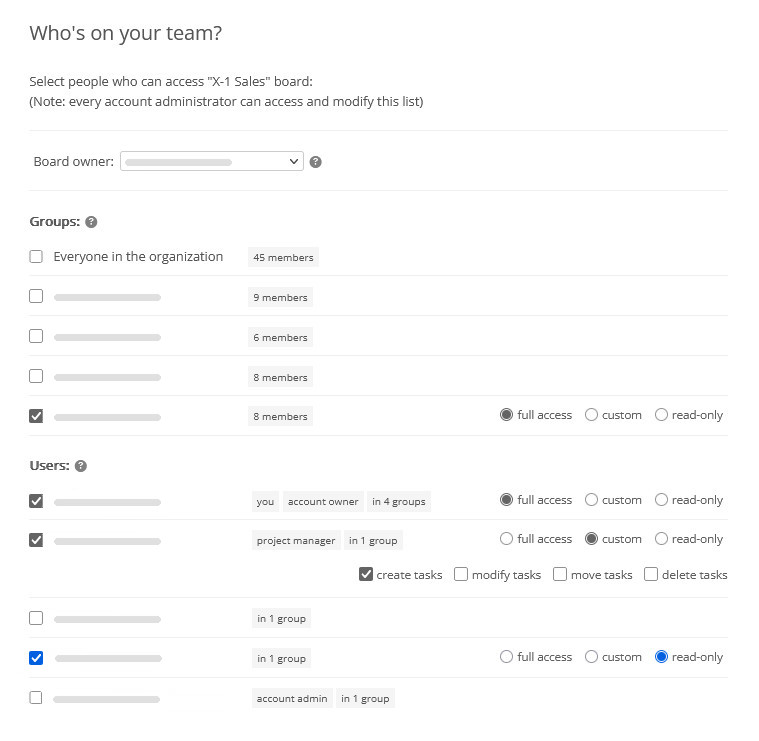
To give someone a read-only access to your board, please use the share option of a specific board, and choose read-only for the person, people, or a defined user group, whose access you wish to limit.
You can also pick specific access settings for your colleagues from among the available custom access rights - for instance, allowing your account users to edit cards, but not create new ones nor delete any of the existing tasks.
Board owner & folder owner: Increasing a user's editing rights
By default, regular users (lacking any special privileges) and project managers only have access to the boards that were shared with them, or to those that they’ve created themselves.
A good way of allowing these users to edit a board, that was not created by themselves, is to make them a board owner. This will enable them to edit to the board’s settings, without you having to give them admin privileges.
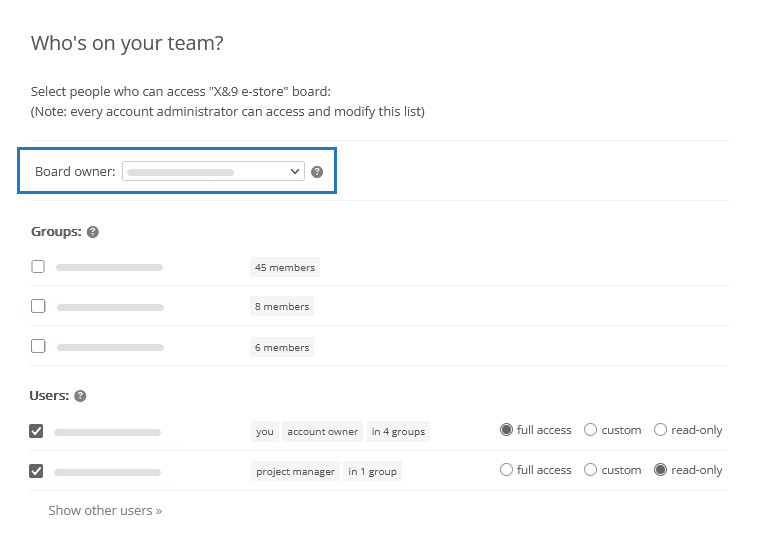
The board owner access right can be assigned from a board’s share option.
Correspondingly, the same can be done for an entire folder of boards.
If you tend to create a folder for each project or area of work and this area has a dedicated user, it is recommended, that this person is made an owner of this folder. This allows them to edit the boards that were placed within it without having to get higher access privileges.
Note, that just sharing a folder with a project manager will only allow them to view and work on boards already present in this folder and to create their own boards. They will not be able to edit these board settings until they are made an owner of that folder.
How to change the language?
Kanban Tool currently supports following languages: English, Spanish, Portuguese, German, Italian, French, Polish and Russian.
Each user of your account can select the interface language that works best for them.
A user profile’s interface language can be changed in either of these two places:
-
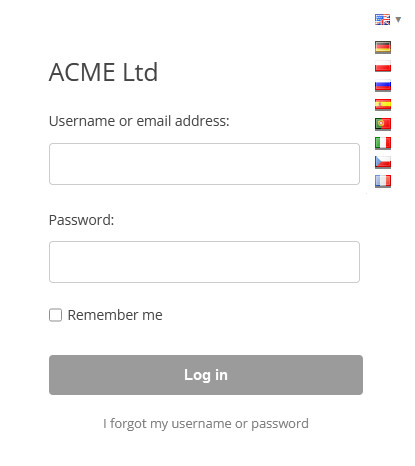
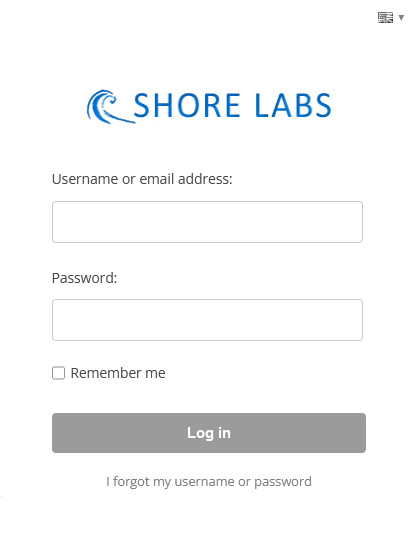
From your personal login screen at your-account-name.kanbantool.com/login - note the country flag icon at the top right side of the login window - it’s editable, just click the flag representing your chosen language:
-
From My Profile, available under your name displayed in the top right corner of the dashboard.
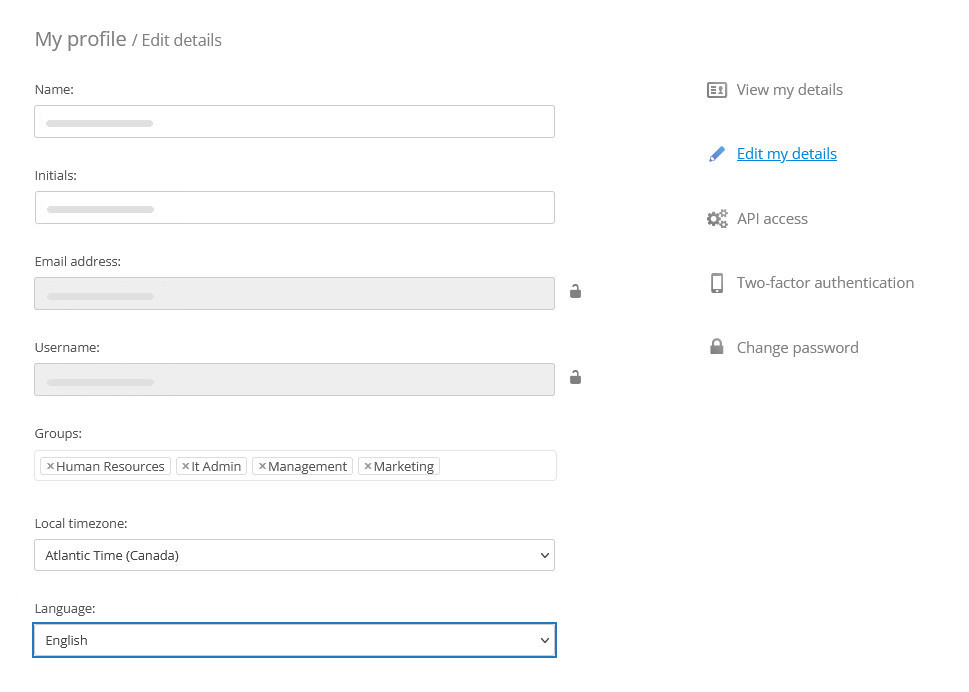
Access the dashboard: Then, click on your name in the top-right corner, and choose My Profile: And finally, go to Edit my details to choose your preferred language:
How to set up two-factor authentication?
Two-factor authentication adds an extra layer of security to your Kanban Tool user authentication process, by asking you not only for your password when logging in but also for a secret time-limited verification code. You will need to read this code from a dedicated mobile application on your phone and type it on your login screen every time that you log in.
The application that you need to install for this is Google Authenticator (Android, iOS), Microsoft Authenticator (Android, iOS) or any other compatible 2FA application.
The two-factor authentication feature is available to each user of your account individually - every user needs to set it up for themselves.
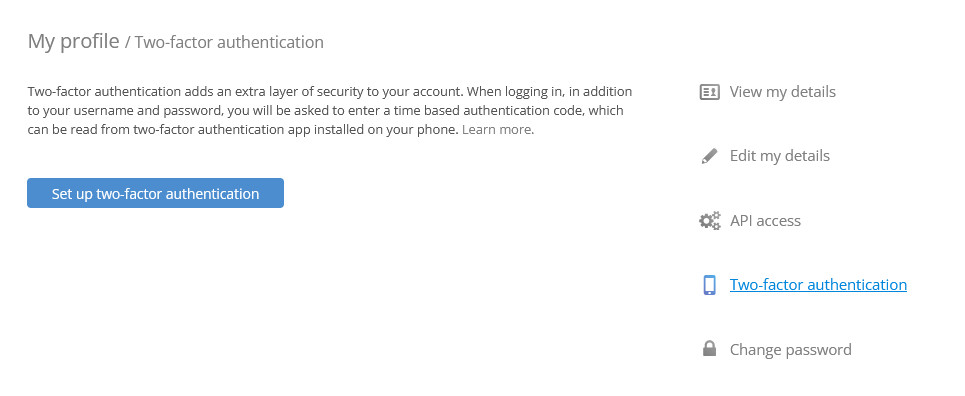
To enable 2FA for your user account, please go to My Profile, available under your name displayed in the top right corner of the dashboard view, Two-factor authentication and click Set up two-factor authentication.
You will be asked to confirm this action with your password:
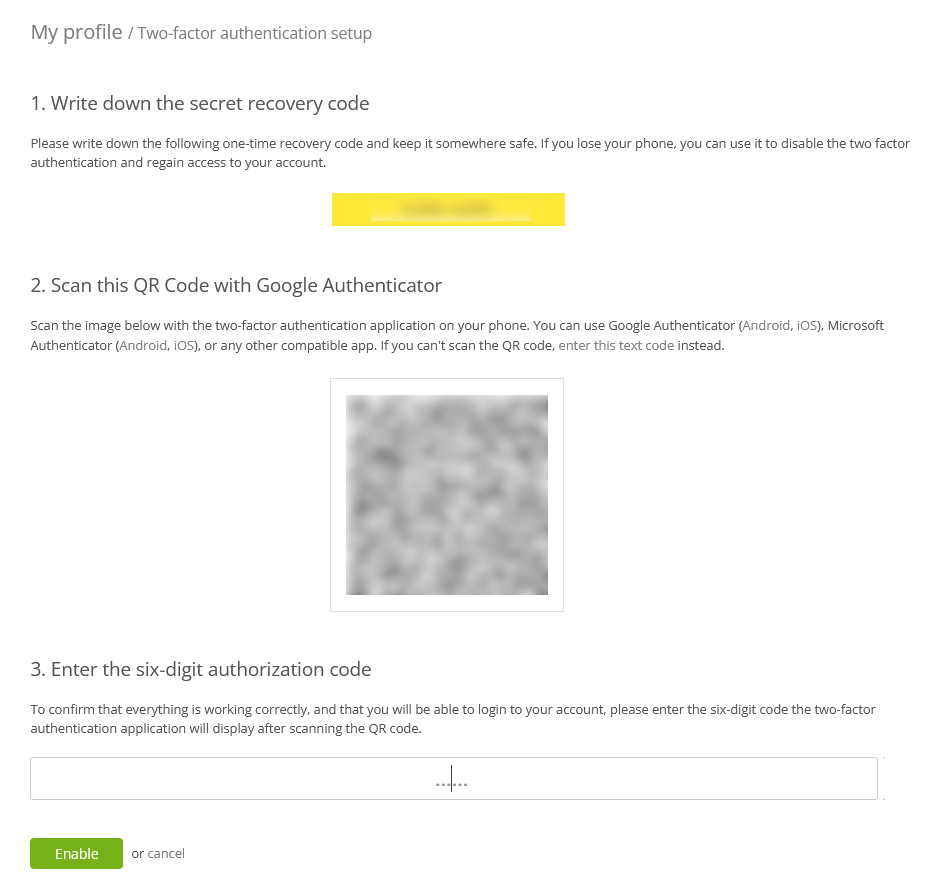
Once done, you will continue to the two-factor authentication setup page.
It’s very important, that you write down the secret recovery code somewhere safe. Please note it someplace, to which you will still have access, in the event that you cannot log in to Kanban Tool. A password manager app is probably the best place for it. This code will deactivate your two-factor authentication in an event when you can no longer confirm your identity with a code from the Authenticator app - for example, because you’ve lost your phone or had it reset to factory defaults.
Once that’s taken care of, proceed to scan your QR code. This ties the application on your phone to your Kanban Tool user account. The app will now be generating time-based six-digit codes, changing every 30 seconds. Enter the verification code that is being displayed by the app and proceed.
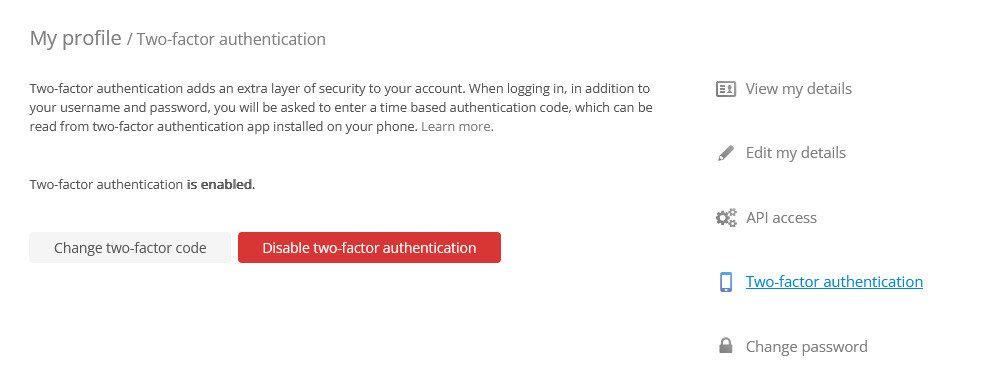
Two-factor authentication is now enabled for your user account.
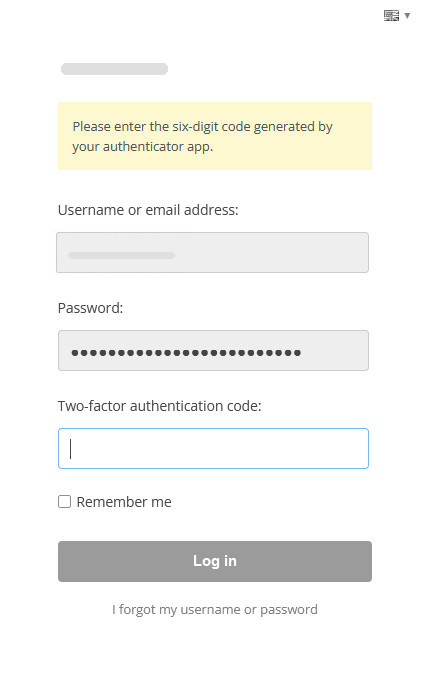
Whenever you attempt to log in to Kanban Tool, either via the web service or our mobile application, you will be asked to give both a password and an authentication code, making it very difficult for anyone to successfully impersonate you.
Should you want to disable 2FA for your account, go to My Profile - Two-factor authentication, and click the red Disable two-factor authentication button.
How to recover an account locked down with 2FA?
If you have enabled two-factor authentication for your account, but can no longer access your authorization codes, please use the recovery code. It will disable the two-factor authentication on your account and allow you to log in.
If you have lost the recovery code, please contact your account owner. Account owners can disable two-factor authentication for other users from the People page.
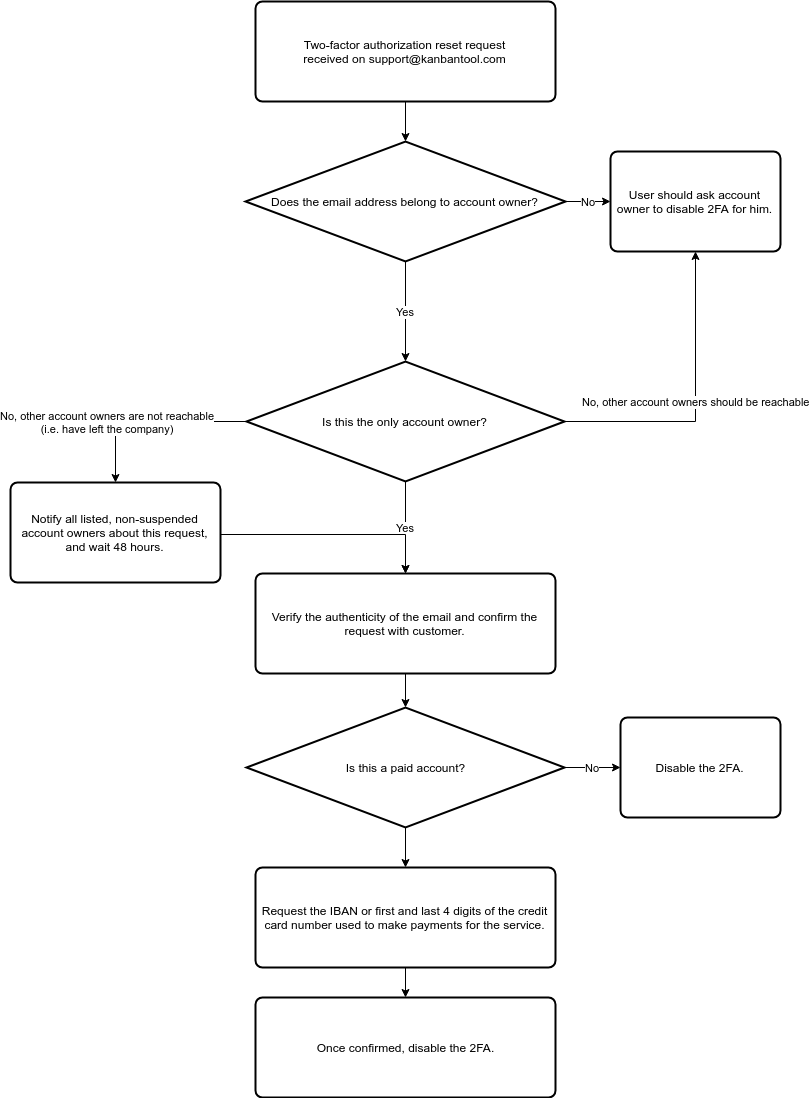
If you are the only account owner and have been locked out, please contact us on support@kanbantool.com. We will use the following procedure to verify the ownership of your account and disable the two-factor authentication for you:
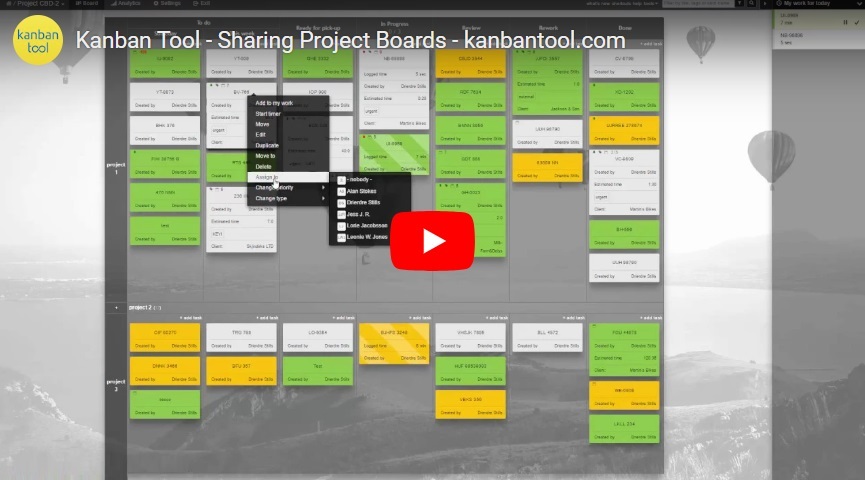
The diagram above is only an overview of how the recovery procedure works - we may modify it from time to time without prior notice.
Can I upload my company logo to the account?
Yes, provided, that you are an account owner, you are welcome to do so, thereby making a visual connection between your workflow and your company branding.
You can add a logo image from Account Administration - Account Settings. Your logo will be shown on your account login page, and the dashboard.
User groups: Easier access management
When someone is tagged as a member of a group, they will automatically gain access to all boards, which were shared with that group. This simplifies both sharing new boards with people and adding new users to the account. Simply specify which group or groups someone belongs to, and they will see those group’s boards automatically.
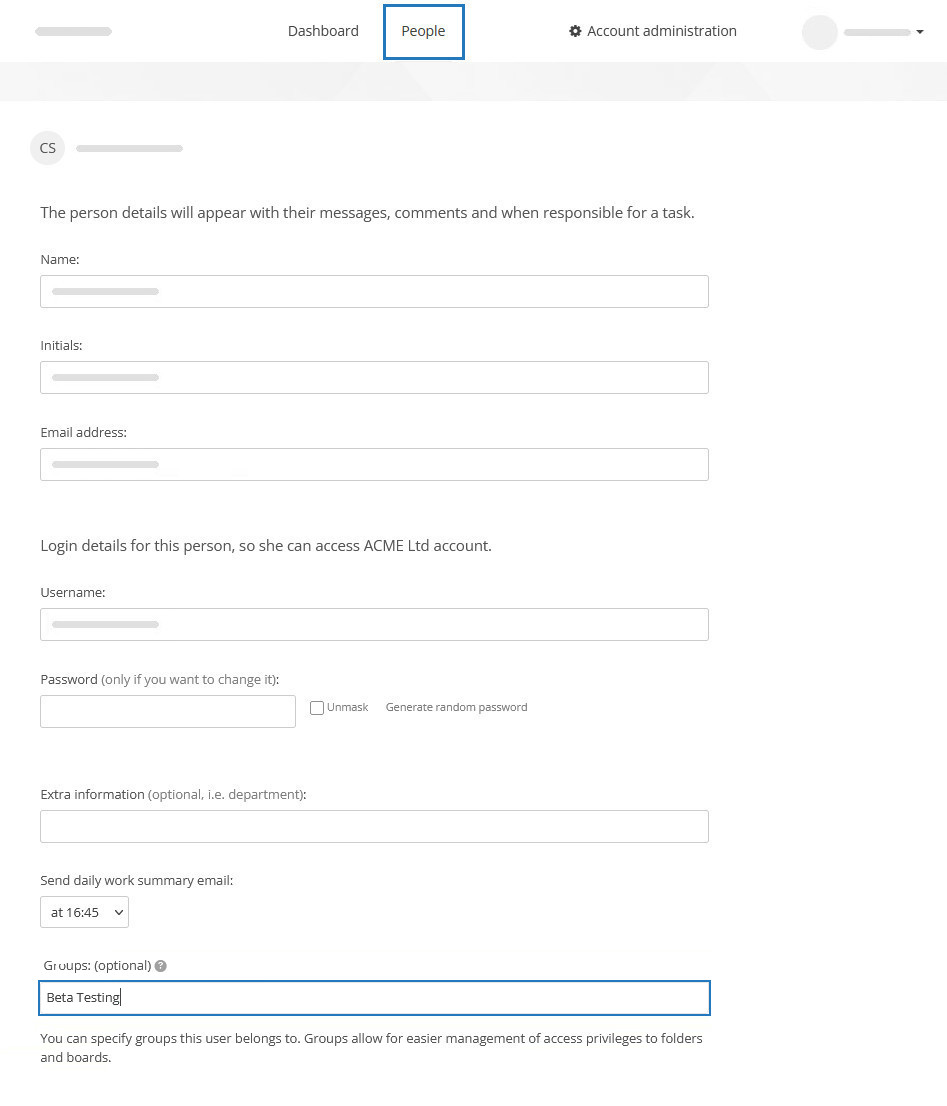
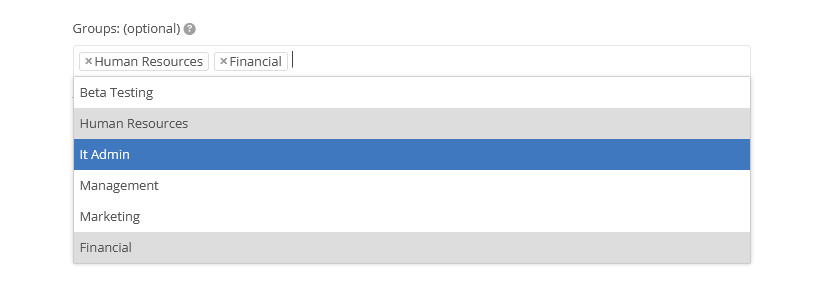
To create a user group, go to the People tab, and click to “edit” a user. Add a new group name under “groups” and save changes.
All groups that were created in this way become available to pick in any user’s group drop-down menu. So, you only need to type a group name when you’re creating it - existing groups can be picked from the list.
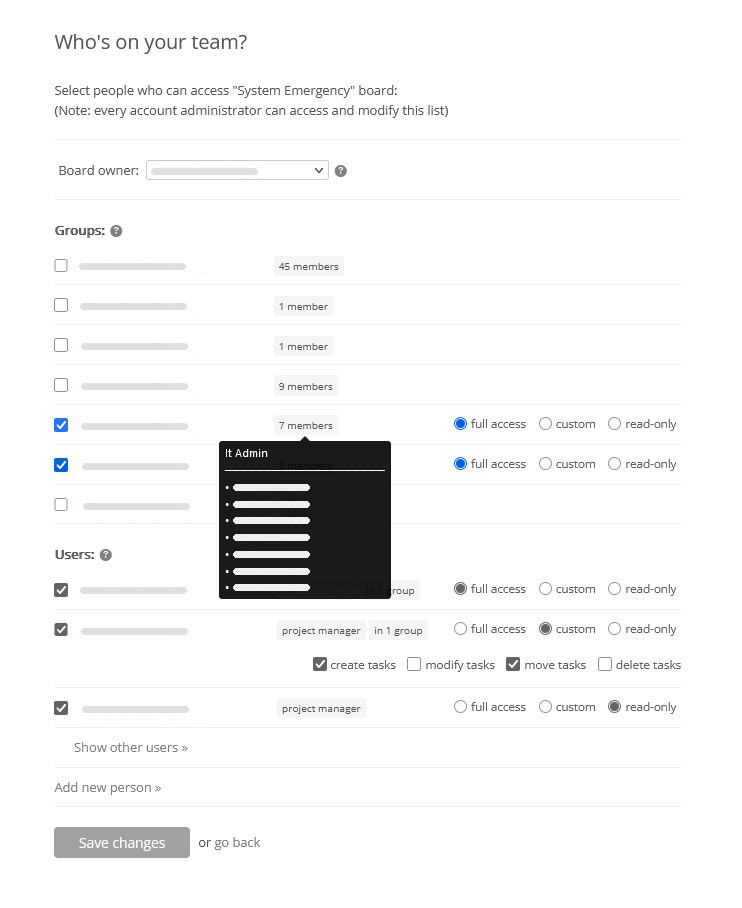
When you then go to share a board or folder with people, you’ll have the option to share it with a whole group in one go. Sharing options for a group remain the same, as for individuals: you are still in control over if a group gets full, read-only or custom access to a board or folder.
If a person is in a group, that you’ve shared a board with, you no longer have to check their name for individual access. Of course, other individual users can still be given access permissions to a board shared with a group.
Please note, that access rights that were given to someone through groups sum up, and that individual user rights will always override those gained through being part of a group.
Example: You can be in groups A and B, and for “group A” to have rights to only create tasks on a specific board, and for “group B” to have rights to only delete tasks on that board. So, by summing these up, on a board shared with groups A and B, you will be able to both create and delete tasks.
Still, if an admin edits your access rights for this specific board, and gives you full access - you will be able to perform all possible board actions. And likewise, when your group rights give you full access to a board, it is still possible for an admin to limit your privileges on board, by editing your individual rights.
An added feature of sharing boards with user groups is being able to make comments with a notification sent to all members of the group - this action is much easier than having to mark each individual separately for this notification.
Please note, user groups are only available to the Enterprise plan subscribers. You can manage your service plan in Account Administration - Plan & Billing details.
How to manage account users and my profile settings?
The account dashboard
Kanban Tool’s focus are project boards, and each board has its unique settings page, while the account admins decide which boards are visible to specific team members.
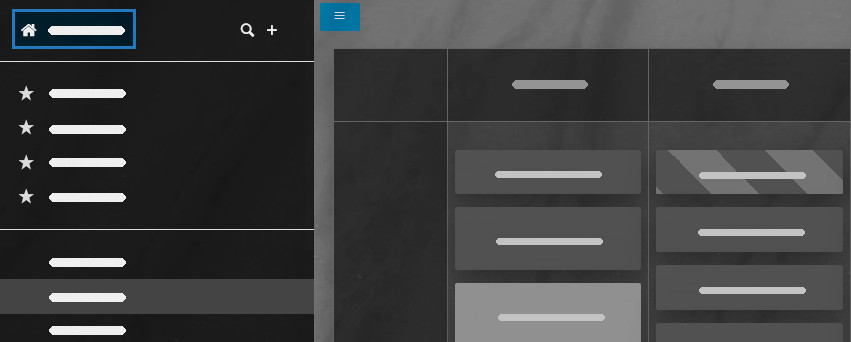
But to view or change your entire Kanban Tool account preferences, and see the complete account user list, you need to exit a specific board view and go to the account dashboard:
Here’s what you’ll see in the dashboard, depending on your user access privilege:
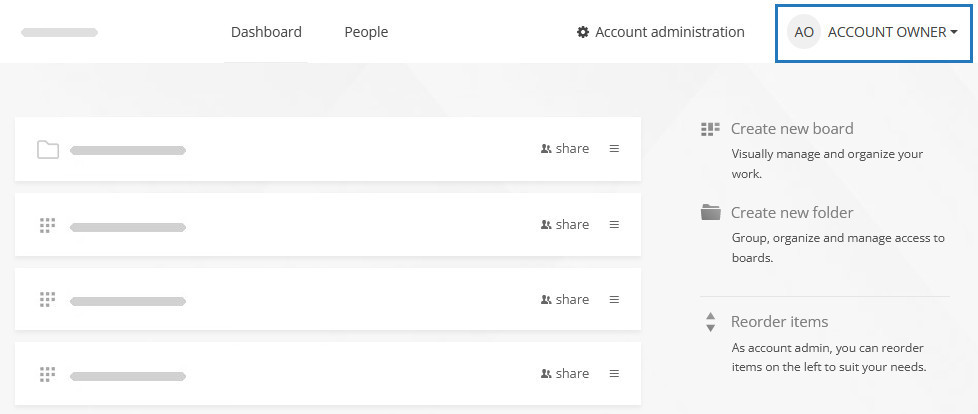
- If you’re an account owner, you’ll see all the boards that the team has created, as well as the People page, on which you can see and manage all users, and the Account Administration page, from which you can adjust the account and subscription settings, or where you can cancel the account.
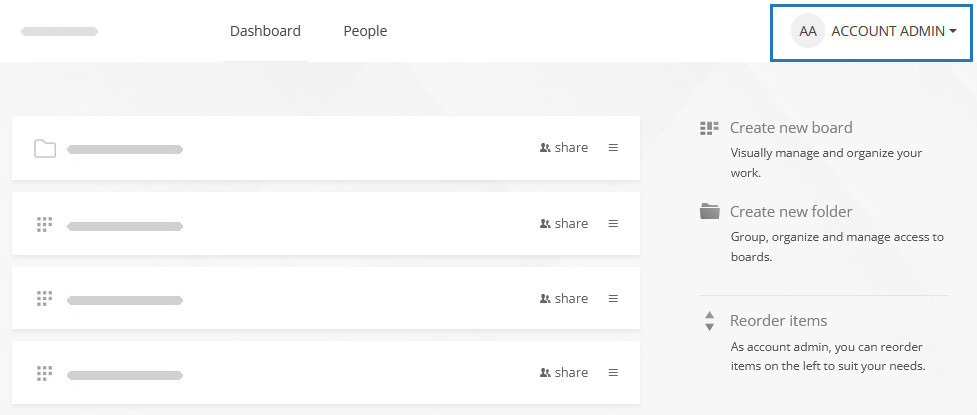
- If you’re an account admin, you’ll see all the boards the team has created and the People page, where you can see and manage all team members, except for the account owner/owners users.
- Account owner and account admin users alike can see and edit the user list - under the People tab.
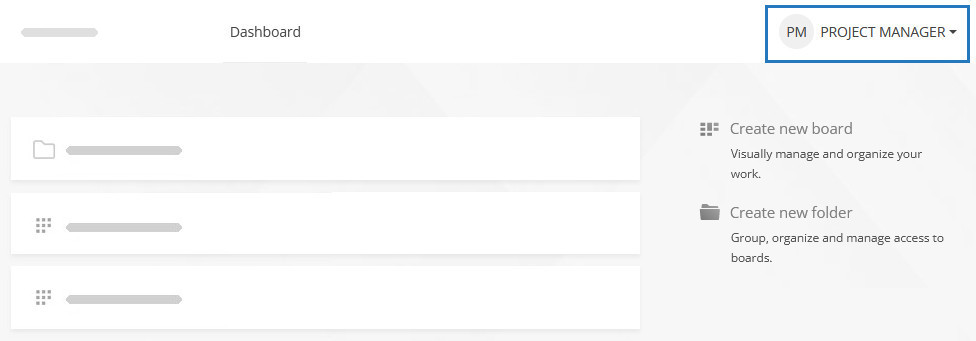
- If you’re a project manager, you’ll see the project boards you created and those shared with you by others.
- Last but not least, if you have no special access privileges within the account, the dashboard will simply show you the boards others have given you access to.
An individual user's My profile
Regardless of access privileges, each account member has their individual My profile page, where they can change their email address, password, initials, messaging preferences, interface language, and time zone settings. My profile is also where users can activate their API access and Two Factor Authentication.
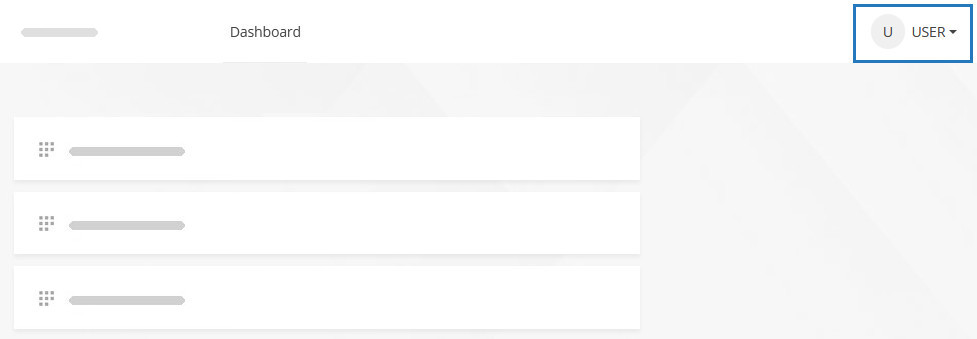
My profile is available under the user’s name, visible in the top-right corner of the dashboard view:
My Profile: How to change my user settings?
The My Profile page lets you change the email address associated with your user account and enable or disable Kanban Tool’s daily emails such as Work Summary, Due Dates reminder, or notifications about new task & checklist item assignments.
To access it, go to the dashboard:
Then, click on your name in the top-right corner, and choose My Profile:
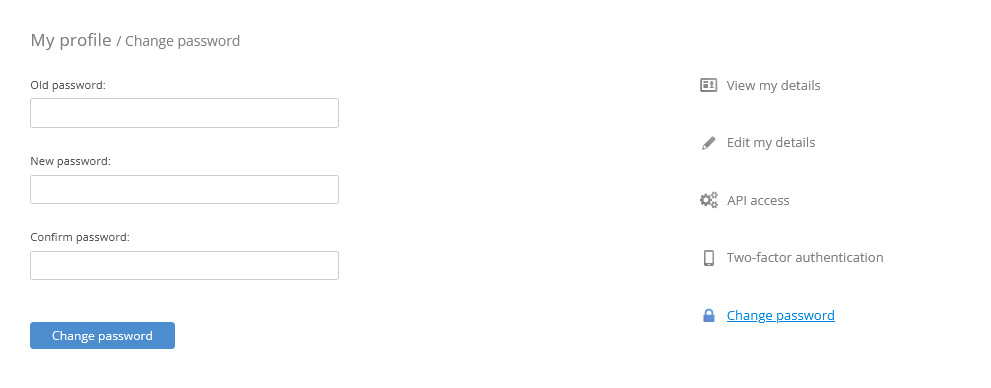
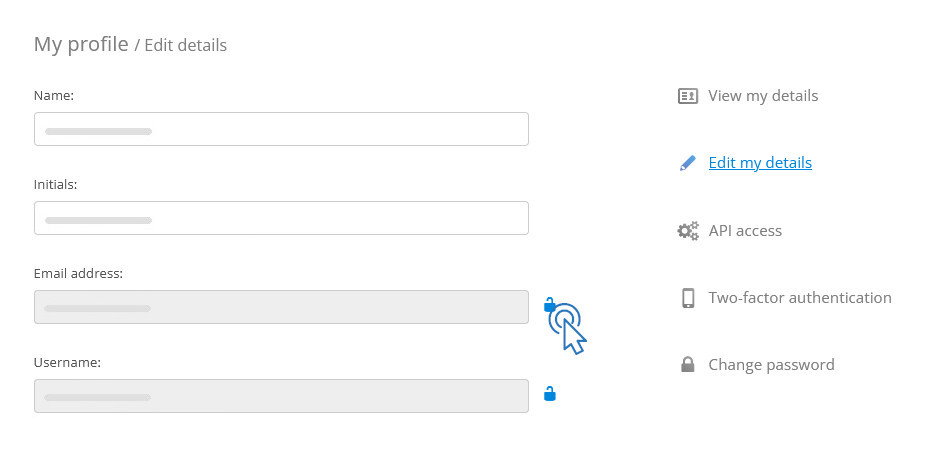
To change the email address, or username, you first need to click the lock icon, enter your current password, and then provide the new data.
Aside from toggling the above settings, you can also see what user groups you are in and edit your name and initials, time zone, and interface language.
Kindly note the time zone and language settings relate to your user only - other team members can use different interface languages and their local time zones.
My Profile is also where you can activate your API access, enable two-factor authentication, and change your password.
Firefox won't let me log in with MS Teams
Since June 2022, the Mozilla Firefox browser supports Total Cookie Protection by default. As a result, some Kanban Tool clients may experience difficulties when logging in to a Microsoft Teams-integrated account with the “Sign in with Microsoft” SSO option. The login screen may loop indefinitely, failing to complete the login action.
To solve the problem, please click on the shield icon in Firefox address bar
and disable the Enhanced Tracking Protection is ON for this site option:
That should let the page complete the login procedure.
If it did not help, please click the shield icon again, and go to Protection settings:
Under Enhanced Tracking Protection, click the Custom option and apply the Cross-site tracking cookies selection:
Account user definition
Kanban Tool’s monthly pricing is proportional to the number of account users, and your user volume can change from one month to the next, affording you great flexibility and cost management.
Within Kanban Tool, a user is anyone registered as a member of your account.
Your account users are listed on the People page:
If you suspend a user, they’ll stop being accounted for in monthly billing, and they’ll no longer be able to log in to their user profile, and collaborate on the boards.
Should you need help sharing the board with others and inviting the team to collaborate, please view this guide.
I use Kanban Tool inside Teams - why are some of my users doubled?
The problem has an easy explanation, and a simple solution.
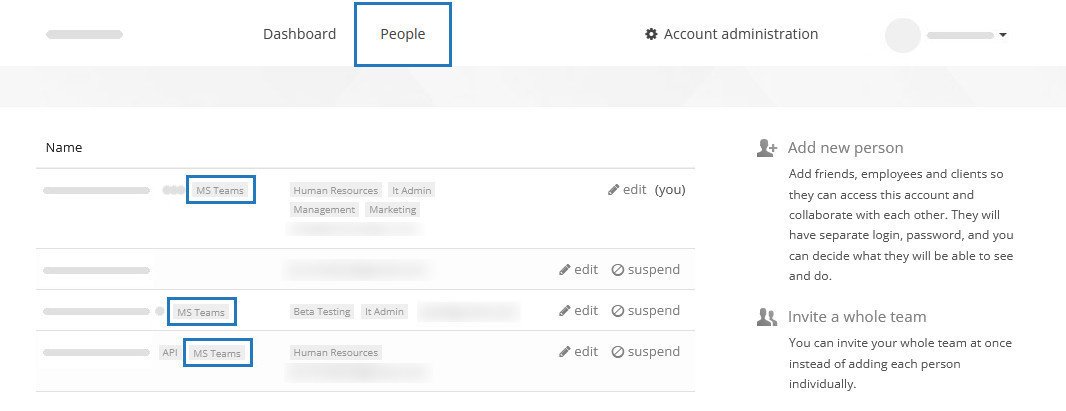
When using Kanban Tool with Microsoft Teams, your team members should create their Kanban Tool users for themselves by using the “Sign in with Microsoft” login button on the Kanban Tool tab. Doing that creates a user integrated with the person’s Microsoft Teams profile, and you will see an MS Teams badge next to those usernames on the account’s People page:
But, to allow for a collaboration with people outside of your organization, e.g., clients, contractors, consultants, etc., you can also invite a new member manually by typing in their email address. A member created in this way will not have an MS Teams badge on the user list, and will need to log in with a username/password combination rather than the Microsoft Teams Single-Sign-On button.
Therefore, if you go to your account’s People list and see two records for a given person - one with an MS Teams badge and one without, it means someone on your team has manually invited this person instead of waiting for them to join by clicking “Sign in with Microsoft”. The two records referring to the same person are completely separate users, and it is best to suspend one of them to minimize confusion. If the member in question is part of your Microsoft organization, please suspend the one that lacks the MS Teams badge, and kindly make sure they are aware of now having to log in with the Microsoft login button only.
After that, please take a moment to review your Kanban Tool boards’ share pages to make sure the no-longer-doubled team member is ticked (✔) for access to the boards they need.